
Can’t figure out how to install Magento 2?
Well, it’s not exactly a straightforward task. But the good news is, it’s worth all the effort!
If we had to compare Magento 1 vs Magento 2, M2 is definitely a clear winner. Magento 2 was released with considerable improvements in scalability, speed, and performance.
With enhanced site & catalog management, dynamic marketing & management features, and 24/7 support, I think it’s safe to say that Magento is more of a beast now than it was before.
We’ve created a full-proof Magento installation guide. Hopefully, this will make the entire installation process seem less like a maze.
Take a look at the table of content to get an overview of the entire process. I’ve divided everything into four steps to make everything easier.
Table of Content:
- Step 1: Set Up Your Environment
- Step 2: Get the Magento Software
- Step 3: Complete Installation Using:
- Step 4: Verify
- Conclusion
Step 1: Set Up Your Environment
There are certain elements you need to set up before proceeding with your installation process. These include:
1. Web services: Apache 2.2 or 2.4, Nginx 1.8
2. Database engine: requires MySQL 5.6 or 5.7. Alternatively, you can also use MariaDB and Percona.
3. PHP version: PHP 7.0.2 up to 7.0.10. Note that PHP 7.0.5 is an exception since it has an issue that upsets the Magento code compiler. You can also use versions 5.6x.
4. PHP extension requirements: curl,gd, ImageMagick 6.3.7 or later,intl,mbstring,mcrypt,mhash,openssl,PDO/MySQL,SimpleXML,soap,xml,xsl,zip,json (PHP 7 only),iconv (PHP 7 only).
5. Cache system: You can use Vanish or Mem-cached.
6. Mailing system: You need to install email services to be able to send emails from Magento 2. You can use MTA or SMTP server.
7. SSL certificate: A valid security service with Transport Layer Security is required.
Step 2: Get the Magento Software
There are three methods to get the Magento software.
2.1 Method I: Install the Magento Archive on Your Server
This is the easiest way of Magento software installation and is for anyone who wants to go down the less technical path to install Magento.
Magento provides the following downloads:
- Magento Commerce and Open Source.
- Magento Commerce and Open Source with Sample data.
Note: If you install Magento with Sample data, then once your installation is complete you’ll see that a sample website with the Luma theme will appear. This will help you understand Magento faster.
In this method, you basically download a compressed Magento Software archive file.
2.1.1 Download the Magento Software
To Download Magento Open Source:
- Visit https://magento.com/tech-resources/download
- Select:
- Whether you want to install with or without sample data
- The version you want to install. Example version 2.x.x
- Choose the format in which you want to install your file.The archive files are available in .zip, .tar.bz2, .tar.gz formats.
To download Magento Commerce:
- Log in to your Magento account and click on the download option on the left.
- Click on the Magento Enterprise edition 2.X and choose if you want with or without sample data.
- Follow the instructions to complete the download.
- Transfer the installation package to your development system.
2.1.2 Transfer the Archive file to your server:
Now that you have downloaded the compressed software file on your computer, it’s time to transfer it to your server.
1. You have to install a File Transfer Protocol (FTP) client or Secure Copy Protocol (SCP) client to transfer files. You can use Filezilla or WinSCP for Windows and CyberDuck for Mac.
2. Create a connection between your FTP client and your Magento server using your client’s guideline.
3. Log in to your server.
4. Locate the Magento archive file on your computer system by browsing to locate the web server docroot directory. Take a look at this example figure:
5. Transfer the archive file from your computer system to the web server’s docroot directory.
6. Once the file transfer is complete, log in to your Magento server.
7. Change to the webserver docroot or the virtual host directory.
8. Create a subdirectory for Magento Software and copy the archive file there.
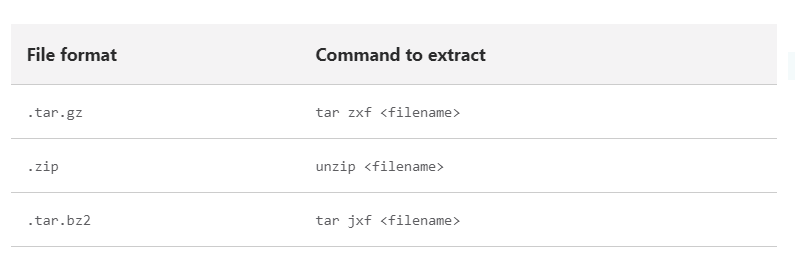
2.1.3 Extract the software on your server:
Log in to the Magento server and use the following commands to extract your archive files:
Set up pre-installation permissions for:
1. You’re required to set up ownership and permissions for one user if you’re using shared hosting. In this case, you log in to the Magento server as the same user who also runs the webserver.
2. You’re required to set up ownership and permissions for two users if you’re using dedicated hosting.
The last step would be to run either Command line or Web Setup Wizard to complete the installation process. We’ll get into that later.
2.2 Method II: Get a Metapackage and install Magento 2 using Composer
Composer is a dependency management tool for PHP. In this method, you have to install Composer and get the Magento Metapackage to manage Magento components and dependencies.
Prerequisite: Install Composer. We’re going to proceed assuming you have already installed Composer. In case you haven’t, install from here.
Once you have installed Composer, the next step is to get the Magento Metapackage:
- To get the Metapackage log in to the Magento server as the file system owner.
- Change to the web server docroot directory or a directory that you have configured as a virtual host docroot.
- Create a new project in your server using one of the following commands depending on your Magento plan:
- Open Source
composer create-project –repository=https://repo.magento.com/ magento/project-community-edition <install-directory-name>- Commerce
composer create-project –repository=https://repo.magento.com/ magento/project-enterprise-edition <install-directory-name>You will then be asked to enter the authentication keys, which you can set up from the Magento Marketplace. In case you haven’t set up your keys, follow these steps:
- Log into the Marketplace or register.
- Once logged in, click on your account name and select your profile.
- There you’ll see the Marketplace tab. Click on the access keys option under this tab.
- Click on ‘create a new access key’ and create your public and private keys.
- The public key is the username and the private key is your password.
Next step would be to set file permissions:
This step is important. You must set up read-write permissions for the webserver group before installing the software. This is so that Web Setup Wizard and Command line can write files to the Magento file system.
Use the following commands to set permissions:
cd /var/www/html/<magento install directory>find var generated vendor pub/static pub/media app/etc -type f -exec chmod g+w {} +find var generated vendor pub/static pub/media app/etc -type d -exec chmod g+ws {} +chown -R :www-data . # Ubuntuchmod u+x bin/magentoOnce this is complete, install Magento through one of these:
- Web Setup Wizard
- Command-line
2.3 Method III: Install Magento 2 using Github.
Before we proceed, it’s important to note that if you’re installing Magento 2 using Github, then you’re a developer who wants to contribute to the Magento Open Source codebase.
You won’t be able to run Magento in a production environment. Meaning, you won’t be able to run a live store that accepts orders.
Prerequisite: You’re required to install Composer for this method as well.
1 Clone the Magento Github repository from here.
2. Create an authorization file by generating Magento authentication keys Github personal access tokens. Follow this guide to know more.
3. Run the composer install command to update dependencies. For example, run the following command if you’re using:
- Ubuntu
cd /var/www/magento2 && composer install- CentOS
cd /var/www/html/magento2 && composer install4. Set ownership and file permissions as seen in method II.
5. Install Magento 2 using Web Setup Wizard or Command-Line.
Step 3: Install Magento 2 Using:
3.1 Web Setup Wizard
Once you’ve acquired your Magento software using any of the above methods, you’re required to complete the installation process using the Web Setup Wizard.
Follow these steps:
- Open your browser and enter the following URL:
| http://<Magento-host-or-IP>/<path-to-magento-root>/setup |
For example, if your IP address is 102.91.240.1, you installed Magento 2 in the magento2/ directory relative to the web server’s docroot, and you did not configure a Virtual Host, your URL will be:
http://102.91.240.1/magento2/setup.
2. The welcome page will now appear. Click on Agree and Setup to proceed.
- Step 1: The readiness check will appear and it will confirm if your system is ready for installation. It will verify your system’s:
- PHP versions
- PHP extensions
- File permissions
- PHP settings.
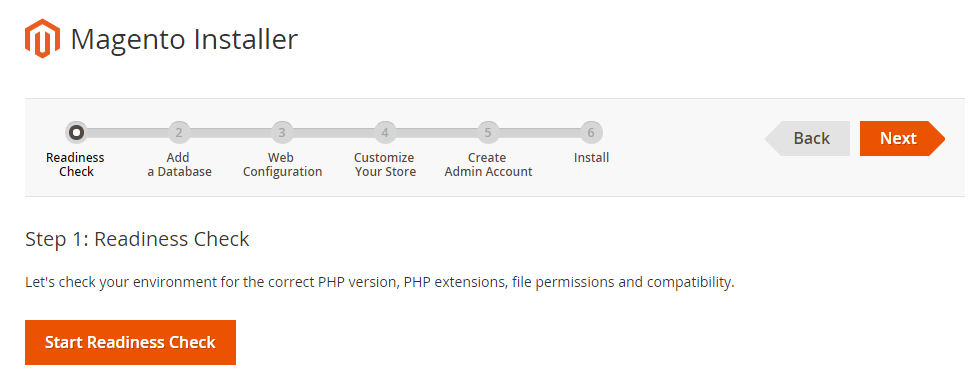
If everything has been correctly set up, you will move to the next step. If not see readiness check issues
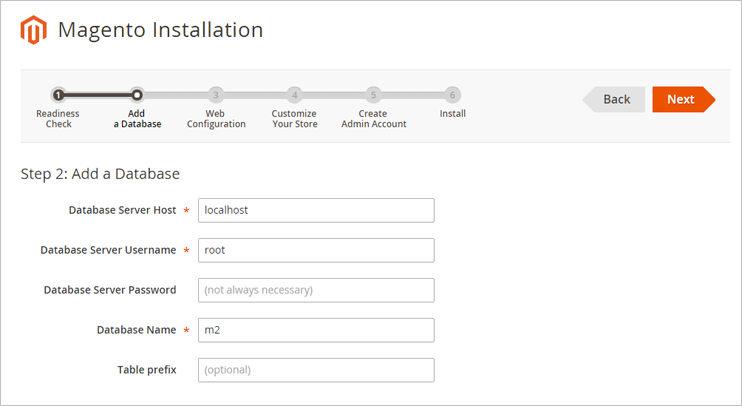
- Step 2 enables you to set up your Magento database by adding in your server username and password.
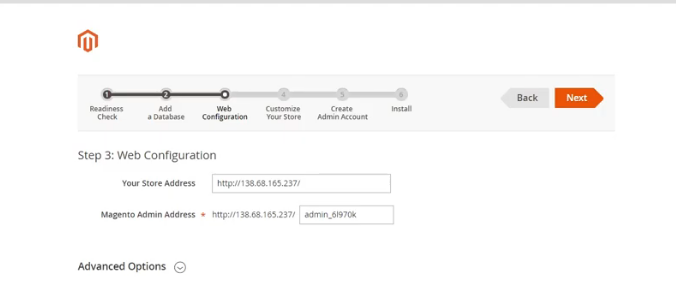
- Step 3 is web configuration. It will require you to enter admin and storefront URLs.
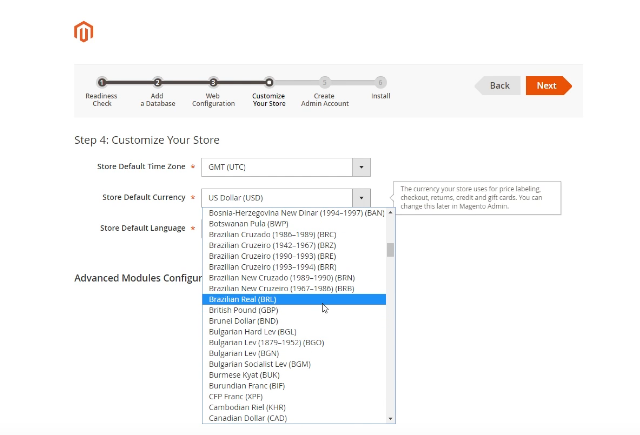
- Step 4: customize your store allows you to set your store’s default language, currency and time zone.
- Step 5: create admin account that will enable you to set up an administrator by setting a name, password, and email.
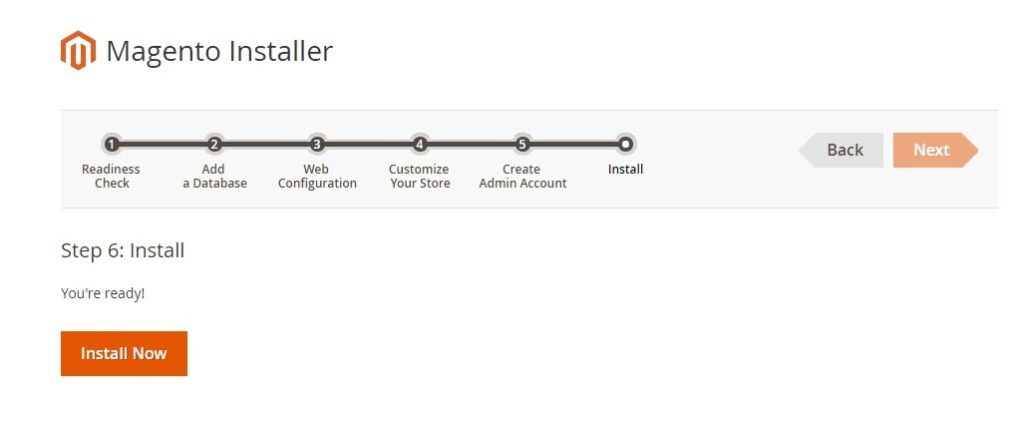
- In the last step, you click on install now to finish your installation.
3.2 Command line
Follow these steps to download Magento 2 using the command line:
1. Go to your Magento 2 web root directory:
cd /var/www/html/magento2
2. Follow these commands:
bin/magento setup:install
--base-url=http://localhost/magento2ee
--db-host=localhost
--db-name=magento
--db-user=magento
--db-password=magento
--admin-firstname=webscoot
--admin-lastname=admin
[email protected]
--admin-user=admin
--admin-password=admin123
--language=en_US
--currency=USD
--timezone=America/Illinois
--use-rewrites=1
Where:
- Database name is Magento
- Username and password are both Magento
- Properties of Magento administrator:
- First name is webscoot and the last name is admin
- Username is Admin and password is admin123
- E-mail address is [email protected]
- Default language is en_US (US English)
- Default currency is USD
- Default time zone is America (Illinois)
Step 4: Verify Installation
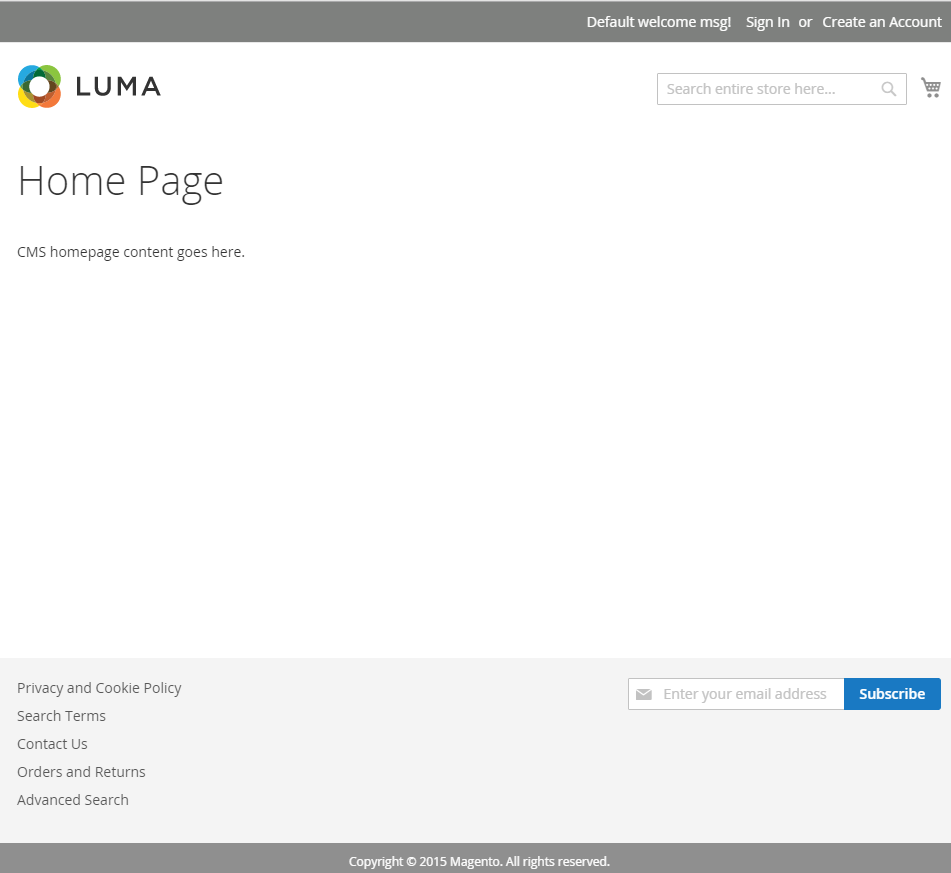
4.1 Verify the storefront
Open your web browser and type in your Magento storefront URL. For example, if the URL is http://magentowebsite.com, then open it in your browser.
If the following page appears then your installation is complete.
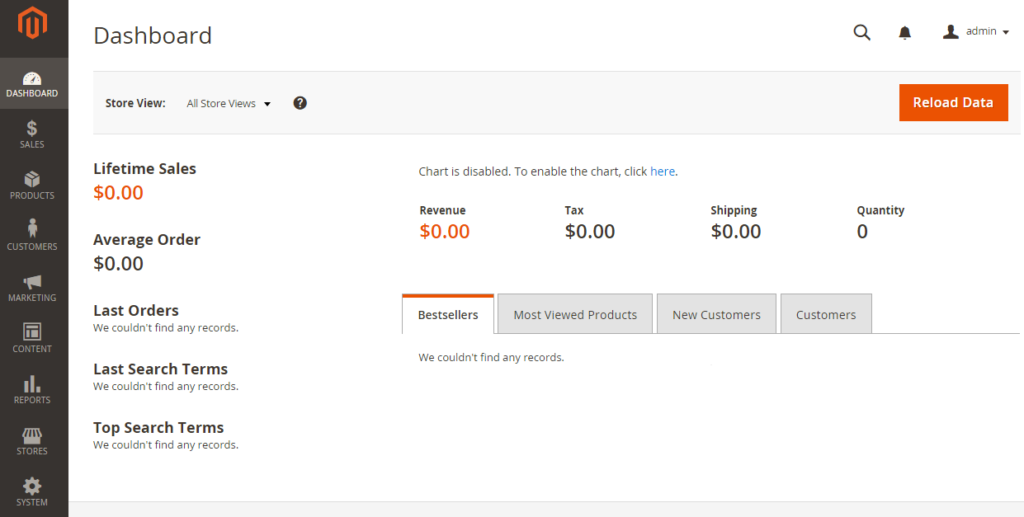
4.2 Verify the Magento 2 Admin
http://www.magentowebsite.com/admin_au1nT in your browser’s search bar. If the following sample page appears, your installation was a success.
Conclusion
I hope you’re able to install Magento 2 without much hassle after following this guide.
If you’re still having some problems, you can talk to our experts here. We provide hosting services and can take on installation for you!
If you already have Magento 1 installed and want to migrate to Magento 2, you can now do that with zero downtime using our services.

Divya loves writing and is passionate about marketing. When not trying to hone her skills, you’ll find her either reading or binging on TV shows.


Finally found best blog post on How to Install Magento 2: Complete Guide, thank you Divya & Webscoot team for this awesome & self explanatory article.